Aside from ephemeral, S3 and EBS Amazon glacier is another storage offering from AWS. This is a very cheap and very slow storage. The essential purpose is perhaps to hold backed up/archived data that is not intended for frequent use. Glacier can interact with numerous backup/archiving tools via Rest APIs to server as a data storage location.
In this article I'll describe the creation of a glacier vault and a user who would have access to the vault which is essentially the container which will hold data. This user would be created within the backup software and configured to interact with glacier.
To start off click on glacier in the storage section within AWS services dashboard. The following screen is displayed.

In the next screen we set a name for our new vault.

In the next screen we can choose to enable event notifications.


Now click on the user name. This will display a summary of the users' attributes. From here click on Add inline policy because we'll now be granting our new user access to the glacier vault we created earlier.
 Next select policy generator

In the section section we'll be setting user permissions. Set effect to allow and select Amazon glacier as AWS service. Under actions selecting "all actions selected" will provide all available privileges to the user for the vault. We can restrict the privilege level if we require. The ARN is a resource identifier and we can retrieve the resource identifier for the vault by just clicking on it.

Finally click on add statement and then click on next step.

In the next screen we are shown are new policy in JSON format. Click on apply policy.

After this we are presented with the summary section of the user again with the new inline policy now being associated with the user.

In this article I'll describe the creation of a glacier vault and a user who would have access to the vault which is essentially the container which will hold data. This user would be created within the backup software and configured to interact with glacier.
To start off click on glacier in the storage section within AWS services dashboard. The following screen is displayed.

In the next screen we set a name for our new vault.

In the next screen we can choose to enable event notifications.

I'll disable notifications for now and click on next step.

Here we can review the settings. Once done click submit. This creates the vault and we can view information on the same

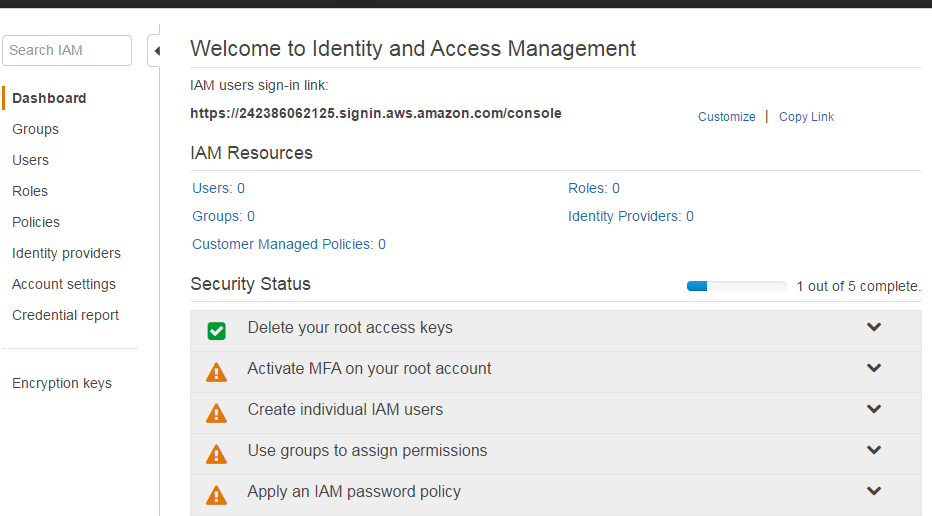
Now we'll create a user which we will associate with this vault. To do so click on IAM under Security, Identity and compliance section of the AWS dashboard. This will open up the IAM dashboard.
From here click on users.and on the next screen click on add user and the following box will open.

Enter the desired user name and check mark pragmatic access. This will provide a secret key to be used along with the user name for authentication.
Skip the permission section for now and go straight to review. From there click on create user.
We will now be provided the users' secret key. You need to save this as it cannot be retrieved.

After this we'll be returned back to the user section of the IAM dashboard and we can see that our user has been created.

Now click on the user name. This will display a summary of the users' attributes. From here click on Add inline policy because we'll now be granting our new user access to the glacier vault we created earlier.


In the section section we'll be setting user permissions. Set effect to allow and select Amazon glacier as AWS service. Under actions selecting "all actions selected" will provide all available privileges to the user for the vault. We can restrict the privilege level if we require. The ARN is a resource identifier and we can retrieve the resource identifier for the vault by just clicking on it.

Finally click on add statement and then click on next step.

In the next screen we are shown are new policy in JSON format. Click on apply policy.

After this we are presented with the summary section of the user again with the new inline policy now being associated with the user.


Thanks for providing such a good information keep update AWS Online Course
ReplyDelete