Autoscaling represents the concept of elasticity in the AWS cloud infrastructure.
Here are some of its major features:
To create an autoscaling group, click on autoscaling groups within the autoscaling menu under the EC2 dashboard.

This brings up the below screen:

Click on create autoscaling group.
The first step in creating an autoscaling group is to create a launch configuration.

The launch configuration is the foundation AMI we'll use to create instances. Click on create launch configuration.
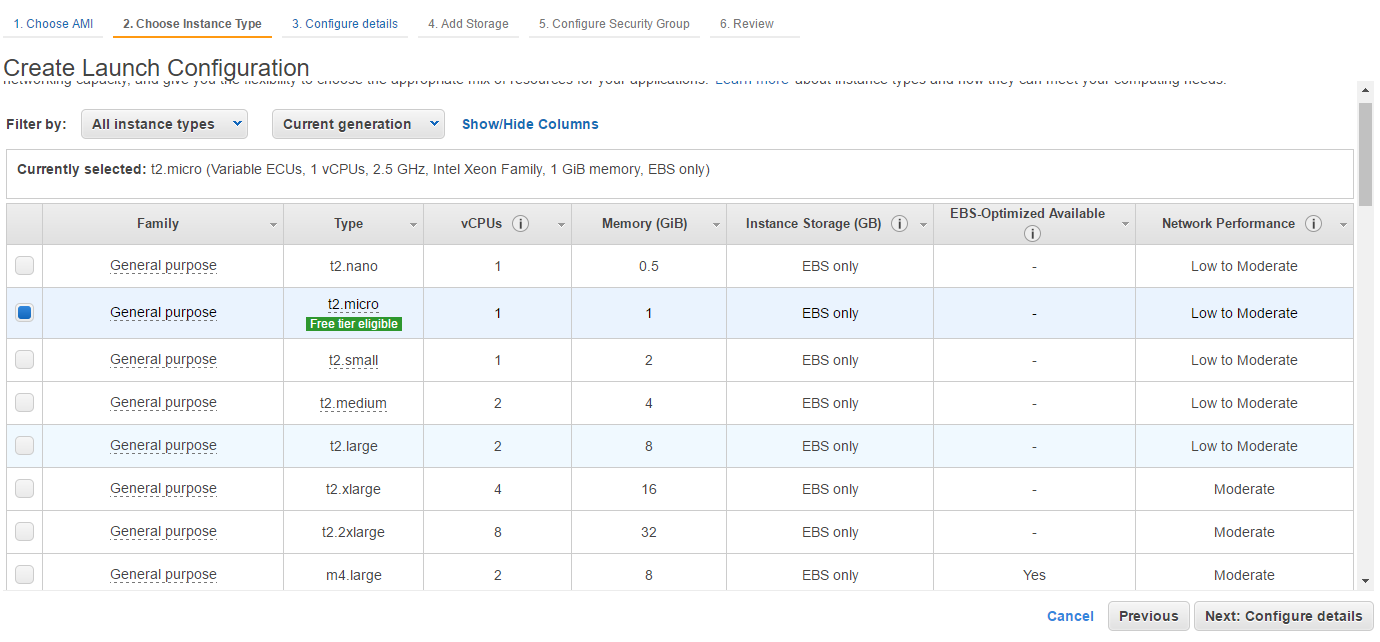
This will bring the list of available AMI options similar to what we see when we deploy a stand alone on demand EC2 instance.
From the available option I've selected the Amazon Linux AMI and in the next screen I've selected the free tier instance. Once the type of instance is selected click on configure details.

In the configure details section we will set a name for our launch configuration. We can optionally request for spot instances and enable cloudwatch monitoring. On expanding the advanced details section we can see that we have the option of enabling or disabling the assignation of elastic IPs to the instances that get deployed using this launch configuration.
The user data field is particularly interesting because here we can add our bootstrap scripts o be applied to the instances being launched.

In the preceding sections we can modify the storage allocation to the instances and apply security group memberships against them. I've kept these settings at defaults. Finally we are presented with the below review screen.

Now click on create launch configuration. This will prompt us for selecting the key pairs we'd like to use to authenticate against the instances.

I've selected a key pair that I had created earlier.
Once the launch configuration gets created we'll be dropped to the autoscaling group creation wizard.
 Here we give the autoscaling group a name and supply networking information. Under the advanced details section I've integrated an ELB I had created earlier with this autoscaling group and specified that I'd like ELB to do the health checks every 5 minutes.
In the next section we configure scaling policies which allow us to define conditions to grow or shrink the number of EC2 instances in a granular fashion.
We need to create alarms or triggers to scale up and scale down.
First under the Increase group size section we'll click on Add New Alarm.

Here we define a trigger saying that when the average CPU utilization is greater than 80% for 1 consecutive period of 5 minutes, add another EC2 instance.
If we want to take additional steps/actions in this scaling policy we can click on add step and specify the action. For example I've specified that I'd like another instance to be launched if the CPU utilization exceeds 90%.
Similarly we define an alarm for shrinking the environment when the traffic or load drops.

So, now we have our scaling policies ready.

We can configure notifications and add tags to our autoscaling group but I've skipped them for the sake of this demonstration.
Finally we can review our selections and once satisfied click on create autoscaling group.

The following page indicates successful creation.

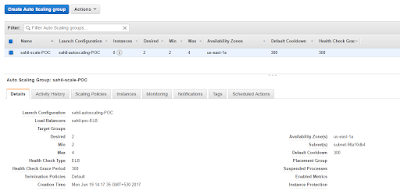
Click on view autoscaling groups to view the status of the group we just created.
I would like to mention here that the creation of an autoscaling group might fail due to limitations set on user accounts by AWS.
Here are some of its major features:
- Autoscaling allows the user to grow or shrink the AWS compute infrastructure based on a set of metrics.
- We can use bootstraping or dynamic configuration of our EC2 instances using configuration management tools like chef and powershell scripts to configure our instances according to our requirement while they are being deployed.
- Autoscaling can be integrated with CloudWatch monitoring to trigger launch or termination of EC2 instances if a metric is above or below a defined threshold. We can also configure autoscaling to schedule the launch and termination of instances during a particular time window.
- Notification services like SNS or SQS can be integrated with autoscaling. For example if SQS detects that number of messages in a queue exceed a certain amount then deploy more EC2 instances.
- Last but definitely not the least, autoscaling is a free service.
To create an autoscaling group, click on autoscaling groups within the autoscaling menu under the EC2 dashboard.

This brings up the below screen:

Click on create autoscaling group.
The first step in creating an autoscaling group is to create a launch configuration.

The launch configuration is the foundation AMI we'll use to create instances. Click on create launch configuration.
This will bring the list of available AMI options similar to what we see when we deploy a stand alone on demand EC2 instance.
From the available option I've selected the Amazon Linux AMI and in the next screen I've selected the free tier instance. Once the type of instance is selected click on configure details.
In the configure details section we will set a name for our launch configuration. We can optionally request for spot instances and enable cloudwatch monitoring. On expanding the advanced details section we can see that we have the option of enabling or disabling the assignation of elastic IPs to the instances that get deployed using this launch configuration.
The user data field is particularly interesting because here we can add our bootstrap scripts o be applied to the instances being launched.


Now click on create launch configuration. This will prompt us for selecting the key pairs we'd like to use to authenticate against the instances.

I've selected a key pair that I had created earlier.
Once the launch configuration gets created we'll be dropped to the autoscaling group creation wizard.

In the next section we configure scaling policies which allow us to define conditions to grow or shrink the number of EC2 instances in a granular fashion.
We need to create alarms or triggers to scale up and scale down.
First under the Increase group size section we'll click on Add New Alarm.

Here we define a trigger saying that when the average CPU utilization is greater than 80% for 1 consecutive period of 5 minutes, add another EC2 instance.
If we want to take additional steps/actions in this scaling policy we can click on add step and specify the action. For example I've specified that I'd like another instance to be launched if the CPU utilization exceeds 90%.
Similarly we define an alarm for shrinking the environment when the traffic or load drops.

So, now we have our scaling policies ready.

We can configure notifications and add tags to our autoscaling group but I've skipped them for the sake of this demonstration.
Finally we can review our selections and once satisfied click on create autoscaling group.

The following page indicates successful creation.

Click on view autoscaling groups to view the status of the group we just created.

I would like to mention here that the creation of an autoscaling group might fail due to limitations set on user accounts by AWS.
ReplyDeleteIt is really a great work and the way in which you are sharing the knowledge is excellent.Amazon Web service Training in Velachery
Nice blog! thanks for providing for information. For more updates get touch with AWS Online Course
ReplyDelete