
Getting the software:
Nagios core source, nagios core plugins & NRPE can be downloaded from source forge.
Installing nagios core:
We require some pre-requisite packages before installing nagios core.
yum install httpd php gcc glibc glibc-devel gd gd-devel -y
It's not recommended to install nagios as root so first we'll add nagios user & group.
[root@centops ~]# useradd -m nagios
[root@centops ~]# passwd nagios
Changing password for user nagios.
New password:
BAD PASSWORD: it is WAY too short
BAD PASSWORD: is too simple
Retype new password:
passwd: all authentication tokens updated successfully.
We'll run our commands as nagcmd group & make nagios & apcahe members of this group.
[root@centops ~]# groupadd nagcmd
[root@centops ~]# usermod -G nagcmd nagios
[root@centops ~]#
[root@centops ~]# usermod -a -G nagcmd apache
[root@centops ~]#
We'll extract nagios core source code
root@centops ~]# tar zxvf nagios-4.2.1.tar.gz
nagios-4.2.1/
nagios-4.2.1/.gitignore
nagios-4.2.1/Changelog
nagios-4.2.1/INSTALLING
nagios-4.2.1/LEGAL
nagios-4.2.1/LICENSE
nagios-4.2.1/Makefile.in
nagios-4.2.1/README
nagios-4.2.1/README.asciidoc
nagios-4.2.1/THANKS
nagios-4.2.1/UPGRADING
nagios-4.2.1/base/
nagios-4.2.1/base/.gitignore
nagios-4.2.1/base/Makefile.in
nagios-4.2.1/base/broker.c
nagios-4.2.1/base/checks.c
nagios-4.2.1/base/commands.c
-------------------------------------------
-------------------------------------------
Now run configure to check for system configuration & make version:
[root@centops nagios-4.2.1]# ./configure --with-command-group=nagcmd
checking for a BSD-compatible install... /usr/bin/install -c
checking build system type... x86_64-unknown-linux-gnu
checking host system type... x86_64-unknown-linux-gnu
checking for gcc... gcc
checking whether the C compiler works... yes
checking for C compiler default output file name... a.out
checking for suffix of executables...
checking whether we are cross compiling... no
checking for suffix of object files... o
checking whether we are using the GNU C compiler... yes
checking whether gcc accepts -g... yes
checking for gcc option to accept ISO C89... none needed
checking whether make sets $(MAKE)... yes
checking for strip... /usr/bin/strip
checking how to run the C preprocessor... gcc -E
-----------------------------------------------------------
Creating sample config files in sample-config/ ...
*** Configuration summary for nagios 4.2.1 09-06-2016 ***:
General Options:
-------------------------
Nagios executable: nagios
Nagios user/group: nagios,nagios
Command user/group: nagios,nagcmd
Event Broker: yes
Install ${prefix}: /usr/local/nagios
Install ${includedir}: /usr/local/nagios/include/nagios
Lock file: ${prefix}/var/nagios.lock
Check result directory: ${prefix}/var/spool/checkresults
Init directory: /etc/rc.d/init.d
Apache conf.d directory: /etc/httpd/conf.d
Mail program: /bin/mail
Host OS: linux-gnu
IOBroker Method: epoll
Web Interface Options:
------------------------
HTML URL: http://localhost/nagios/
CGI URL: http://localhost/nagios/cgi-bin/
Traceroute (used by WAP): /bin/traceroute
Review the options above for accuracy. If they look okay,
type 'make all' to compile the main program and CGIs.
Then we run make all to use the MAKEFIILE & start compiling the nagios core source code.
# make all
Then run make install to put the binaries generated after source code compilation in the path /usr/local/
#make install
--------------------------------------------------------------
*** Main program, CGIs and HTML files installed ***
You can continue with installing Nagios as follows (type 'make'
without any arguments for a list of all possible options):
make install-init
- This installs the init script in /etc/rc.d/init.d
make install-commandmode
- This installs and configures permissions on the
directory for holding the external command file
make install-config
- This installs sample config files in /usr/local/nagios/etc
make[1]: Leaving directory `/root/nagios-4.2.1'
Run make inistall-init to create the init script:
[root@centops nagios-4.2.1]# make install-init
/usr/bin/install -c -m 755 -d -o root -g root /etc/rc.d/init.d
/usr/bin/install -c -m 755 -o root -g root daemon-init /etc/rc.d/init.d/nagios
*** Init script installed ***
[root@centops nagios-4.2.1]# make install-config
/usr/bin/install -c -m 775 -o nagios -g nagios -d /usr/local/nagios/etc
/usr/bin/install -c -m 775 -o nagios -g nagios -d /usr/local/nagios/etc/objects
/usr/bin/install -c -b -m 664 -o nagios -g nagios sample-config/nagios.cfg /usr/local/nagios/etc/nagios.cfg
/usr/bin/install -c -b -m 664 -o nagios -g nagios sample-config/cgi.cfg /usr/local/nagios/etc/cgi.cfg
/usr/bin/install -c -b -m 660 -o nagios -g nagios sample-config/resource.cfg /usr/local/nagios/etc/resource.cfg
/usr/bin/install -c -b -m 664 -o nagios -g nagios sample-config/template-object/templates.cfg /usr/local/nagios/etc/objects/templates.cfg
/usr/bin/install -c -b -m 664 -o nagios -g nagios sample-config/template-object/commands.cfg /usr/local/nagios/etc/objects/commands.cfg
/usr/bin/install -c -b -m 664 -o nagios -g nagios sample-config/template-object/contacts.cfg /usr/local/nagios/etc/objects/contacts.cfg
/usr/bin/install -c -b -m 664 -o nagios -g nagios sample-config/template-object/timeperiods.cfg /usr/local/nagios/etc/objects/timeperiods.cfg
/usr/bin/install -c -b -m 664 -o nagios -g nagios sample-config/template-object/localhost.cfg /usr/local/nagios/etc/objects/localhost.cfg
/usr/bin/install -c -b -m 664 -o nagios -g nagios sample-config/template-object/windows.cfg /usr/local/nagios/etc/objects/windows.cfg
/usr/bin/install -c -b -m 664 -o nagios -g nagios sample-config/template-object/printer.cfg /usr/local/nagios/etc/objects/printer.cfg
/usr/bin/install -c -b -m 664 -o nagios -g nagios sample-config/template-object/switch.cfg /usr/local/nagios/etc/objects/switch.cfg
*** Config files installed ***
Remember, these are *SAMPLE* config files. You'll need to read
the documentation for more information on how to actually define
services, hosts, etc. to fit your particular needs.
[root@centops nagios-4.2.1]# make install-commandmode
/usr/bin/install -c -m 775 -o nagios -g nagcmd -d /usr/local/nagios/var/rw
chmod g+s /usr/local/nagios/var/rw
*** External command directory configured ***
[root@centops nagios-4.2.1]#
You can edit the /usr/local/nagios/etc/objects/contacts.cfg file to add contacts of people who should be alerted when something goes wrong.
To get required apache config in place run
[root@centops nagios-4.2.1]# make install-webconf
/usr/bin/install -c -m 644 sample-config/httpd.conf /etc/httpd/conf.d/nagios.conf
*** Nagios/Apache conf file installed ***
[root@centops nagios-4.2.1]#
Now we'll use htpasswd to create & update the username & password we'll use for logging into the nagios web interface.
[root@centops nagios-4.2.1]# htpasswd -c /usr/local/nagios/etc/htpasswd.users nagiosadmin
New password:
Re-type new password:
Adding password for user nagiosadmin
[root@centops nagios-4.2.1]#
Now restart the apache service
[root@centops nagios-4.2.1]# service httpd restart
Stopping httpd: [ OK ]
Starting httpd: httpd: Could not reliably determine the server's fully qualified domain name, using 192.168.44.138 for ServerName
[ OK ]
[root@centops nagios-4.2.1]#
Now, we'll install the nagios core plugins from nagios-plugins-2.1.3.tar.gz. Extract the file & run configure followed by make install.
[root@centops nagios-plugins-2.1.3]# ./configure --with-nagios-user=nagios --with-nagios-group=nagios
[root@centops nagios-plugins-2.1.3]# make install
Configure nagios to start on boot:
[root@centops nagios-plugins-2.1.3]# chkconfig --add nagios
[root@centops nagios-plugins-2.1.3]# chkconfig nagios on
[root@centops nagios-plugins-2.1.3]#
We'll verify our nagios configuration file & make sure its error free
[root@centops nagios-plugins-2.1.3]# /usr/local/nagios/bin/nagios -v /usr/local/nagios/etc/nagios.cfg
Nagios Core 4.2.1
Copyright (c) 2009-present Nagios Core Development Team and Community Contributors
Copyright (c) 1999-2009 Ethan Galstad
Last Modified: 09-06-2016
License: GPL
Website: https://www.nagios.org
Reading configuration data...
Read main config file okay...
Read object config files okay...
Running pre-flight check on configuration data...
Checking objects...
Checked 8 services.
Checked 1 hosts.
Checked 1 host groups.
Checked 0 service groups.
Checked 1 contacts.
Checked 1 contact groups.
Checked 24 commands.
Checked 5 time periods.
Checked 0 host escalations.
Checked 0 service escalations.
Checking for circular paths...
Checked 1 hosts
Checked 0 service dependencies
Checked 0 host dependencies
Checked 5 timeperiods
Checking global event handlers...
Checking obsessive compulsive processor commands...
Checking misc settings...
Total Warnings: 0
Total Errors: 0
Things look okay - No serious problems were detected during the pre-flight check
[root@centops nagios-plugins-2.1.3]#
Start the nagios service
root@centops ~]# service nagios start
Starting nagios: done.
[root@centops ~]#
Now, if we point out browser to the URL http://<IP address>/nagios we will get a username/password prompt. Enter the credentials created with htpasswd earlier & we'll be able to login to the nagios core homepage:
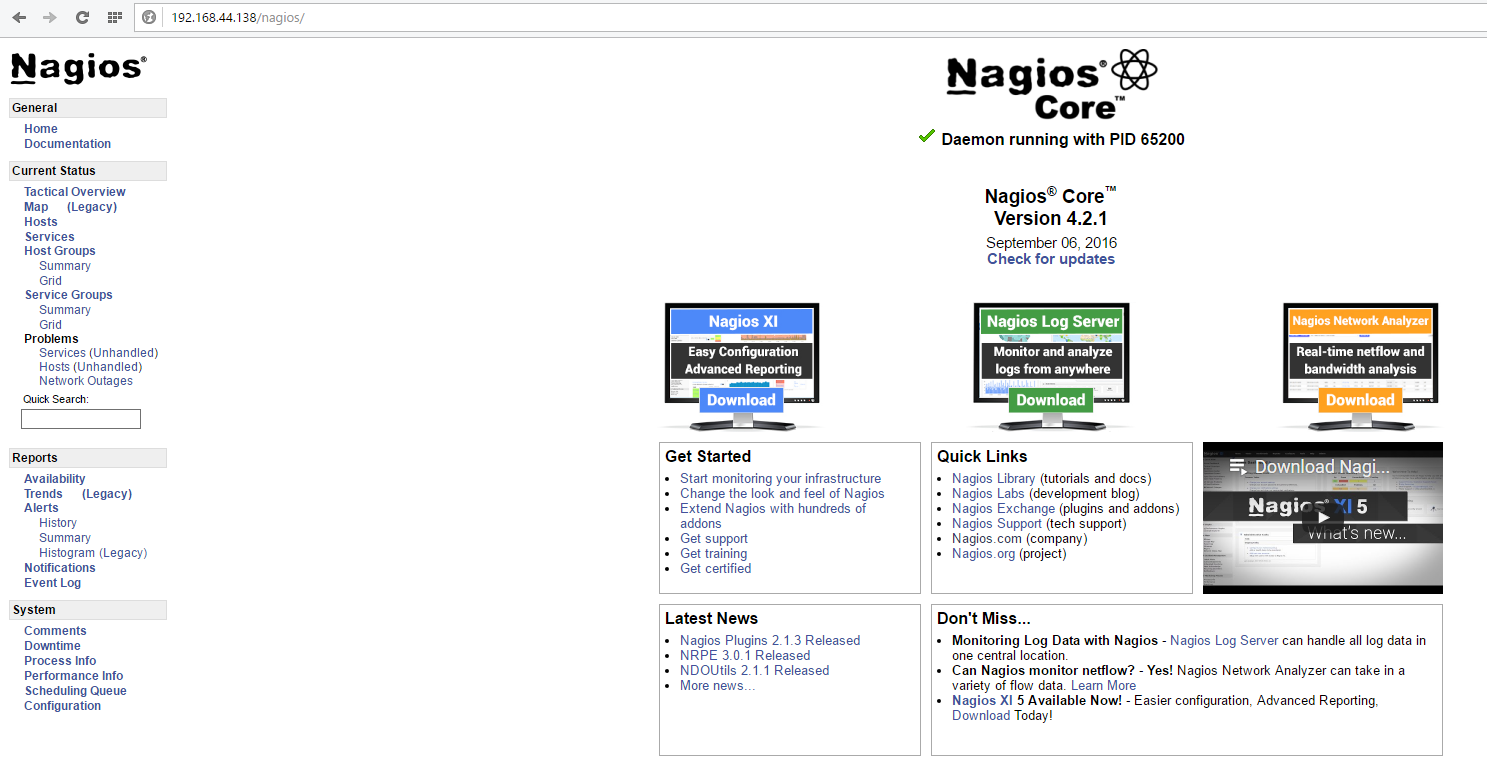
To check for hosts currently being monitored click on hosts tab on the left.

Only locahost is being monitored for now.
Installing nagios client:
We need to install a couple of pre-requisites before installing nrpe.
yum install openssl* xinetd -y
Add the nagios user on client server:
[root@rheldb nrpe-3.0.1]# useradd nagios
[root@rheldb nrpe-3.0.1]#
Extract the fiel nrpe-3.0.1.tar.gz downloaded from source forge & then run configure.
[root@rheldb nrpe-3.0.1]# ./configure
checking for a BSD-compatible install... /usr/bin/install -c
checking what the operating system is ... linux
checking what the distribution type is ... rh
checking what init system is being used ... upstart
*** Configuration summary for nrpe 3.0.1 09-08-2016 ***:
General Options:
-------------------------
NRPE port: 5666
NRPE user: nagios
NRPE group: nagios
Nagios user: nagios
Nagios group: nagios
Review the options above for accuracy. If they look okay,
type 'make all' to compile the NRPE daemon and client
or type 'make' to get a list of make options.
Now run make all followed by make install to compile the source code & generate the binaries.
[root@rheldb nrpe-3.0.1]# make all
cd ./src/; make
make[1]: Entering directory `/root/nrpe-3.0.1/src'
gcc -g -O2 -I/usr/include/krb5 -DHAVE_CONFIG_H -I ../include -I ./../include -o nrpe ./nrpe.c ./utils.c ./acl.c -L/usr/lib6464 -lssl -lcrypto -ldl -lz -lnsl
gcc -g -O2 -I/usr/include/krb5 -DHAVE_CONFIG_H -I ../include -I ./../include -o check_nrpe ./check_nrpe.c ./utils.c -L/usr/lib6464 -lssl -lcrypto -ldl -lz -lnsl
make[1]: Leaving directory `/root/nrpe-3.0.1/src'
*** Compile finished ***
You can now continue with the installation or upgrade process.
Read the PDF documentation (NRPE.pdf) for information on the next
steps you should take to complete the installation or upgrade.
[root@rheldb nrpe-3.0.1]# make install
cd ./src/; make install
make[1]: Entering directory `/root/nrpe-3.0.1/src'
make install-plugin
make[2]: Entering directory `/root/nrpe-3.0.1/src'
/usr/bin/install -c -m 755 -d /usr/local/nagios/bin
/usr/bin/install -c -m 755 ../uninstall /usr/local/nagios/bin/nrpe-uninstall
/usr/bin/install -c -m 775 -o nagios -g nagios -d /usr/local/nagios/libexec
/usr/bin/install -c -m 775 -o nagios -g nagios -d /usr/local/nagios/libexec
/usr/bin/install -c -m 775 -o nagios -g nagios check_nrpe /usr/local/nagios/libexec
make[2]: Leaving directory `/root/nrpe-3.0.1/src'
make install-daemon
make[2]: Entering directory `/root/nrpe-3.0.1/src'
/usr/bin/install -c -m 755 -d /usr/local/nagios/bin
/usr/bin/install -c -m 755 ../uninstall /usr/local/nagios/bin/nrpe-uninstall
/usr/bin/install -c -m 755 nrpe /usr/local/nagios/bin
/usr/bin/install -c -m 755 -o nagios -g nagios -d /usr/local/nagios/var
make[2]: Leaving directory `/root/nrpe-3.0.1/src'
make[1]: Leaving directory `/root/nrpe-3.0.1/src'
[root@rheldb nrpe-3.0.1]#
Restart the xinetd service
[root@rheldb xinetd.d]# service xinetd restart
Stopping xinetd: [FAILED]
Starting xinetd: [ OK ]
Now we will create the nrpe configuration file for xinetd. Xinetd is a service that listens for incoming requests over the network & starts the appropriate service for that request.
Here's our xinetd configuration file for nrpe
[root@rheldb libexec]# cat /etc/xinetd.d/nrpe
service nrpe
{
flags = REUSE
port = 5666
socket_type = stream
wait = no
user = nagios
group = nagios
server = /usr/local/nagios/bin/nrpe
server_args = -c /usr/local/nagios/etc/nrpe.cfg --inetd
log_on_failure += USERID
disable = no
only_from = 127.0.0.1 192.168.44.138
}
Restart the xinetd service again.
We'll also make an entry in /etc/services file for nrpe. This will allow for a more readable output when we are looking into netstat.
[root@centops ~]# grep nrpe /etc/services
nrpe 5666/tcp #NRPE Nagios
[root@centops ~]#
Create a directory /usr/local/nagios/etc where we'll keep our nrpe configuration file.
#mkdir /usr/local/nagios/etc
In the directory where nrpe source code was extracted there will be a directory called sample-config.
go to that directory & copy the file nrpe.cfg to /usr/local/nagios/etc
[root@rheldb nrpe-3.0.1]# cd sample-config/
[root@rheldb sample-config]# ls
nrpe.cfg nrpe.cfg.in
[root@rheldb sample-config]# cp nrpe.cfg /usr/local/nagios/etc/
[root@rheldb sample-config]#
In the nrpe.cfg file update the allowed_hosts directive to add the nagios server IP address.
[root@rheldb etc]# grep allowed_hosts nrpe.cfg
allowed_hosts=127.0.0.1,192.168.44.138
[root@rheldb etc]#
To do a sanity check of our client configuration go to path /usr/local/nagios/libexec & run the following command:
[root@rheldb libexec]# ./check_nrpe -H 127.0.0.1
NRPE v3.0.1
[root@rheldb libexec]#
If there is any error with the client configuration the above command will throw an error.
Now, with our client configuration done we need to add this client to out nagios core server to be monitored.
So, head over to the nagios server & go to the path /usr/local/nagios/etc/objects. Here we have sample client configuration templates.
[root@centops objects]# ls
commands.cfg contacts.cfg localhost.cfg printer.cfg switch.cfg templates.cfg timeperiods.cfg windows.cfg
the template localhost.cfg is the one for linux. So we'll copy it to a file called linuxclient.cfg.
This template is the file for localhost. So, in our file linuxclient.cfg we'll replace all instances of localhost with our client server via the sed command.
[root@centops objects]# sed -i 's/localhost/rheldb/g' linuxclient.cfg
In addition to the hostname we also need to update the IP address of the client in the address directive.
[root@centops objects]# grep address linuxclient.cfg
address 192.168.44.135
[root@centops objects]#
Change the ownership of the client template file to nagios.
chown nagios:nagios linuxclient.cfg
Note that we have to create a separate client configuration template for every node that we wish to monitor under nagios.
Now edit the /usr/local/nagios/etc/nagios.cfg file to add the location of the client template
[root@centops etc]# grep cfg_file nagios.cfg
cfg_file=/usr/local/nagios/etc/objects/commands.cfg
cfg_file=/usr/local/nagios/etc/objects/contacts.cfg
cfg_file=/usr/local/nagios/etc/objects/timeperiods.cfg
cfg_file=/usr/local/nagios/etc/objects/templates.cfg
cfg_file=/usr/local/nagios/etc/objects/localhost.cfg
cfg_file=/usr/local/nagios/etc/objects/linuxclient.cfg
#cfg_file=/usr/local/nagios/etc/objects/windows.cfg
#cfg_file=/usr/local/nagios/etc/objects/switch.cfg
#cfg_file=/usr/local/nagios/etc/objects/printer.cfg
# object configuration files (see the cfg_file and cfg_dir options above).
[root@centops etc]#
Finally restart the nagios service & open up the browser again.
[root@centops objects]# service nagios restart
Running configuration check...
Stopping nagios: done.
Starting nagios: done.
[root@centops objects]#

We should now be able to see that our client server is now being monitored by nagios core.
This article was a 'tip of the iceberg' very basic installation to demonstrate how we can install & configure nagios to monitor linux clients.

No comments:
Post a Comment